Festive, Creamy, and Effortlessly Delightful
I remember the first time I made this No Bake Christmas Peppermint Pie for a holiday gathering. The moment I took that first bite, I was captivated by the creamy peppermint filling paired with the crunchy chocolate crust—it was simply divine! What’s even better is that it’s so easy to whip up, making it a go-to treat during the busy holiday season.
This pie brings an irresistible aroma of mint and chocolate that fills your kitchen, instantly lifting everyone’s spirits. Friends and family can’t help but smile when they see it on the table, making it perfect for cozy dinners or festive parties. It’s a delightful crowd-pleaser that adds a touch of magic to any holiday occasion.
To make your No Bake Christmas Peppermint Pie extra special, consider serving it with a dollop of whipped cream or a sprinkle of crushed candy canes on top for that festive flair. Pair it with a warm cup of cocoa or coffee, and let the joyous flavors envelop you and your loved ones. Trust me, once you take that first slice, you’ll be counting down the days until you can make it again!
What are No Bake Christmas Peppermint Pie?
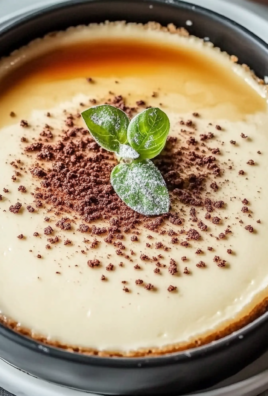
No Bake Christmas Peppermint Pie is a delightful and festive dessert that combines a creamy peppermint filling with a crunchy chocolate cookie crust, making it an ideal treat for holiday gatherings. The rich chocolate cookie crumbs, typically from Oreos or chocolate wafers, create a satisfying crunch that beautifully contrasts with the smooth and luscious filling made of cream cheese, heavy whipping cream, and powdered sugar. Infused with peppermint extract and topped with crushed peppermint candies, this pie offers a refreshing taste reminiscent of the holiday season. Plus, since it requires no baking at all, it’s incredibly easy to prepare and results in minimal cleanup, allowing you to enjoy more time with family and friends.
Perfect For:
Holiday Gatherings: This festive pie is the ideal centerpiece for your Christmas dessert table, delighting guests with its vibrant peppermint flavor and stunning presentation.
Stress-Free Entertaining: With no baking required, you can whip up this delightful treat in no time, leaving you free to enjoy the holiday festivities with family and friends.
A Sweet Treat for Everyone: The creamy filling and crunchy chocolate crust make this pie a crowd-pleaser that appeals to both kids and adults alike, ensuring everyone leaves with a smile.
Last-Minute Desserts: When you’re short on time but want to impress, this easy-to-make pie comes together quickly and can be prepared ahead of time, allowing you to relax before the celebration.
No Bake Christmas Peppermint Pie Ingredients
For the Crust
- 1 cup chocolate cookie crumbs – Use crushed Oreo or chocolate wafers for a rich, chocolaty flavor.
- 1/4 cup unsalted butter (melted) – This helps bind the crumbs together while adding a buttery richness.
For the Filling
- 1 cup heavy whipping cream (chilled) – Whip this until stiff peaks form to give your pie a light and airy texture.
- 8 oz cream cheese (softened) – Softening it allows for a smoother mixture, ensuring no lumps in your filling.
- 1/2 cup powdered sugar – This adds sweetness and blends seamlessly into the creamy filling.
- 1 teaspoon peppermint extract – A must for that refreshing minty flavor that defines No Bake Christmas Peppermint Pie.
- 1/2 cup crushed peppermint candies (for garnish) – These add a festive touch and a delightful crunch on top of your pie.
- 1 cup whipped topping (thawed) – Fold this in to create a fluffy texture that balances the creaminess of the filling.
Kitchen Equipment You’ll Need

- Mixing bowls
- Electric mixer
- 9-inch pie dish
- Rubber spatula
- Measuring cups
- Whisk
How to Make No Bake Christmas Peppermint Pie
Step 1:
In a mixing bowl, combine 1 cup of chocolate cookie crumbs with 1/4 cup of melted unsalted butter. Mix everything together until the crumbs are fully coated and the mixture resembles wet sand. This will form the deliciously crunchy base for your pie.
Step 2:
Once your crust mixture is ready, press it firmly into the bottom and up the sides of a 9-inch pie dish. Make sure it’s packed tightly so it holds its shape when you slice into it later. Refrigerate the crust for about 30 minutes to let it set and become firm.
Step 3:
While the crust is chilling, take a large mixing bowl and beat 8 oz of softened cream cheese with an electric mixer until it’s completely smooth. This step is crucial for creating a creamy filling, so be patient and mix well until there are no lumps.
Step 4:
Gradually add in 1/2 cup of powdered sugar and 1 teaspoon of peppermint extract to the cream cheese. Continue mixing until both ingredients are fully combined and you have a sweet, peppermint-flavored mixture that tastes like holiday magic.
Step 5:
In another bowl, take 1 cup of chilled heavy whipping cream and whip it until stiff peaks form. This means that when you lift the whisk out, the cream should hold its shape nicely. It’s this light, airy texture that will give your pie filling its lovely fluffiness.
Step 6:
Now gently fold the whipped cream into your cream cheese mixture using a spatula. Be careful not to deflate the whipped cream; you want to maintain that wonderful volume. Keep folding until everything is fully incorporated and you see a beautiful light color throughout.
Step 7:
Pour your creamy filling into the prepared chocolate crust and spread it evenly across the top. Take your time to make sure it’s level; this will help with presentation when serving.
Step 8:
Cover your pie with plastic wrap or a lid and refrigerate for at least 3 hours or until it has set nicely. You’ll know it’s ready when it’s firm to the touch but still has that delightful creamy texture.
Step 9:
When you’re ready to serve, remove the pie from the fridge and top it with whipped topping, spreading it evenly over the surface. For that festive touch, sprinkle 1/2 cup of crushed peppermint candies on top — they’ll add a lovely crunch and festive flair!
Tips
- Use chilled equipment: Ensure your mixing bowls and beaters are cold before whipping the cream. Cold tools help achieve better volume and stability in your whipped cream, resulting in a fluffier filling.
- Soften the cream cheese properly: Let the cream cheese sit at room temperature for about 30 minutes before mixing. This ensures a smoother texture without lumps, making it easier to incorporate into the filling.
- Press the crust firmly: When pressing the chocolate cookie crumb mixture into the pie dish, use the bottom of a measuring cup or your fingers to pack it tightly. A well-packed crust prevents it from crumbling when slicing the pie.
- Don’t skip refrigeration time: Allow the pie to chill for at least 3 hours after assembly. This resting period is crucial for achieving a firm set and enhances the flavors as they meld together.
- Layer toppings just before serving: For the freshest presentation, add whipped topping and crushed peppermint candies right before serving. This keeps them from becoming soggy and preserves their texture and flavor.
- Experiment with different chocolates: While chocolate cookies work perfectly, try using dark chocolate or mint-flavored cookies for a unique twist on your crust. Different flavors can elevate your pie’s taste profile!
Optional Ingredients
- Dark chocolate shavings: Add a luxurious touch with rich dark chocolate shavings sprinkled on top, enhancing the dessert’s flavor and visual appeal. Use a vegetable peeler to create delicate curls for an elegant finish.
- Cayenne pepper: For those who enjoy a hint of heat, a pinch of cayenne pepper can elevate the peppermint flavor with a surprising kick. Mix it into the filling for an unexpected twist.
- Fresh raspberries: Brighten up your pie with fresh raspberries, which provide a burst of tartness that complements the creamy filling beautifully. Scatter them on top before serving for a pop of color and flavor.
- Lemon zest: Adding a teaspoon of lemon zest brings a refreshing brightness to your pie, balancing the sweetness and adding a citrusy aroma. Incorporate it into the filling for a delightful zing.
- Chocolate ganache: Drizzle warm chocolate ganache over the top for an indulgent and glossy finish that adds richness and depth to each slice. Simply melt chocolate with cream and let it cool slightly before pouring over the pie.
What to Serve Alongside This
To complement the rich, creamy texture of the No Bake Christmas Peppermint Pie, consider serving a fresh salad as a light starter. A simple arugula salad with sliced pears and candied walnuts provides a delightful contrast. The peppery arugula and sweet pears balance the pie’s sweetness, while the crunch of walnuts adds an appealing texture that keeps the meal refreshing.
Another great pairing is roasted vegetables, such as Brussels sprouts or carrots. The caramelization of these veggies brings out their natural sweetness, which harmonizes beautifully with the peppermint flavor of the pie. Their warm, earthy tones offer a satisfying grounding element that enhances the overall dining experience without overwhelming your palate.
For those craving a comforting side, creamy mashed potatoes infused with garlic would be a perfect match. The buttery richness of the potatoes offers a delightful counterpoint to the pie’s cool creaminess, creating a balanced meal that feels indulgent yet festive. This classic comfort food rounds out your holiday spread and invites guests to indulge in every bite.
Lastly, consider pairing this dessert with a sparkling peppermint mocktail or a light dessert wine like Moscato d’Asti. The bubbles in sparkling drinks cleanse the palate while enhancing the peppermint notes, making each bite of pie even more enjoyable. If you prefer something sweeter, the fruity notes in Moscato perfectly echo the candy canes used as garnish, creating a cohesive flavor journey from appetizer to dessert.
Variations and Substitutions
Graham cracker crust instead: Swap the chocolate cookie crumbs for crushed graham crackers mixed with melted butter for a classic, slightly sweeter base. This variation brings a delightful crunch and a hint of honey flavor, complementing the peppermint filling beautifully.
Dairy-free cream cheese: Use a dairy-free cream cheese alternative in place of regular cream cheese to create a vegan-friendly version of this pie. The texture remains creamy, while still delivering that signature peppermint flavor, making it accessible for those with lactose intolerance.
Coconut whipped cream: Replace heavy whipping cream with coconut whipped cream for a tropical twist. This substitution infuses the pie with a subtle coconut flavor, adding an exotic flair that pairs wonderfully with peppermint.
Chocolate mint cookies: For an even more decadent crust, use crushed mint chocolate cookies instead of regular chocolate cookie crumbs. This variation enhances the minty flavor profile, creating an indulgent treat that will surely impress holiday guests.
Almond extract: Instead of peppermint extract, try using almond extract for a unique flavor twist. This creates a nutty aroma that harmonizes well with the sweetness of the filling, resulting in a delightful surprise that feels both fresh and festive.
Sugar-free powdered sugar: Opt for sugar-free powdered sugar to make this pie suitable for those monitoring their sugar intake. This simple swap allows everyone to indulge without compromising on taste or texture, ensuring it remains a guilt-free treat during the holidays.
Crushed Oreo topping: Instead of crushed peppermint candies for garnish, consider using crushed Oreos on top. This change adds an extra layer of chocolate goodness and provides a delightful contrast to the creamy filling while maintaining that festive spirit.
Refrigerate your No Bake Christmas Peppermint Pie in an airtight container to maintain its creamy texture and prevent it from absorbing other odors. It will keep well in the fridge for up to 4 days. If you find that the filling has softened slightly upon storage, you can briefly chill it again before serving to restore some of its firmness.
This pie does not freeze particularly well due to the cream cheese and whipped topping, as freezing may alter its creamy texture and make it grainy. However, if you wish to freeze it, slice the pie into portions and wrap each piece tightly in plastic wrap before placing them in a freezer-safe container. It can be stored for up to 2 months; to thaw, simply transfer the pie to the refrigerator overnight before serving.
FAQ
Can I use a different type of cookie for the crust?
Yes, you can substitute chocolate cookie crumbs with other types of cookies like graham crackers or even vanilla wafers. Just adjust the amount of sugar if you’re using sweeter cookies to maintain the right flavor balance.
How long should I refrigerate the pie before serving?
You should refrigerate the pie for at least 3 hours to ensure it sets properly. For best results, consider leaving it in the fridge overnight, which will also enhance the flavors.
Can I make this pie ahead of time?
Absolutely! This No Bake Christmas Peppermint Pie is perfect for making ahead of time. You can prepare it a day in advance and store it in the refrigerator until you’re ready to serve.
How do I ensure my whipped cream holds its shape?
To keep your whipped cream stable, make sure it is chilled before whipping and whip it until stiff peaks form. Gently folding it into the cream cheese mixture helps maintain that airy texture.
Is there a way to make this pie gluten-free?
Yes, you can easily make this pie gluten-free by using gluten-free chocolate cookies for the crust. Just check that all other ingredients, such as whipped topping and peppermint candies, are also gluten-free.
Can I use low-fat cream cheese for this recipe?
While you can use low-fat cream cheese, keep in mind that it may slightly alter the texture and richness of the filling. Full-fat cream cheese typically provides a creamier consistency that complements the whipped cream well.

Leave a Comment