Indulgent, Rich, and Oh-So-Sweet
I first whipped up this Oreo Cheesecake Recipe on a cozy Sunday afternoon when the rain was tapping against my window, and I craved something utterly decadent. With its creamy texture and the delightful crunch of crushed Oreos, each bite felt like a warm hug; it was both easy to make and full of flavor, quickly becoming a family favorite.
What truly makes this cheesecake special is the divine aroma that fills your kitchen as it bakes; it’s like an invitation to gather around the table. The smiles on my loved ones’ faces as they take their first bite are priceless—this dessert is perfect for everything from casual get-togethers to romantic date nights.
To elevate your experience, consider serving it with a dollop of whipped cream or fresh berries on the side, adding a pop of color and freshness. With every slice, you’re not just enjoying dessert; you’re creating sweet memories that will linger long after the last crumb is gone. So grab your mixing bowl and let’s dive into this delightful Oreo Cheesecake Recipe—trust me, you won’t regret it!
What are Oreo Cheesecake?
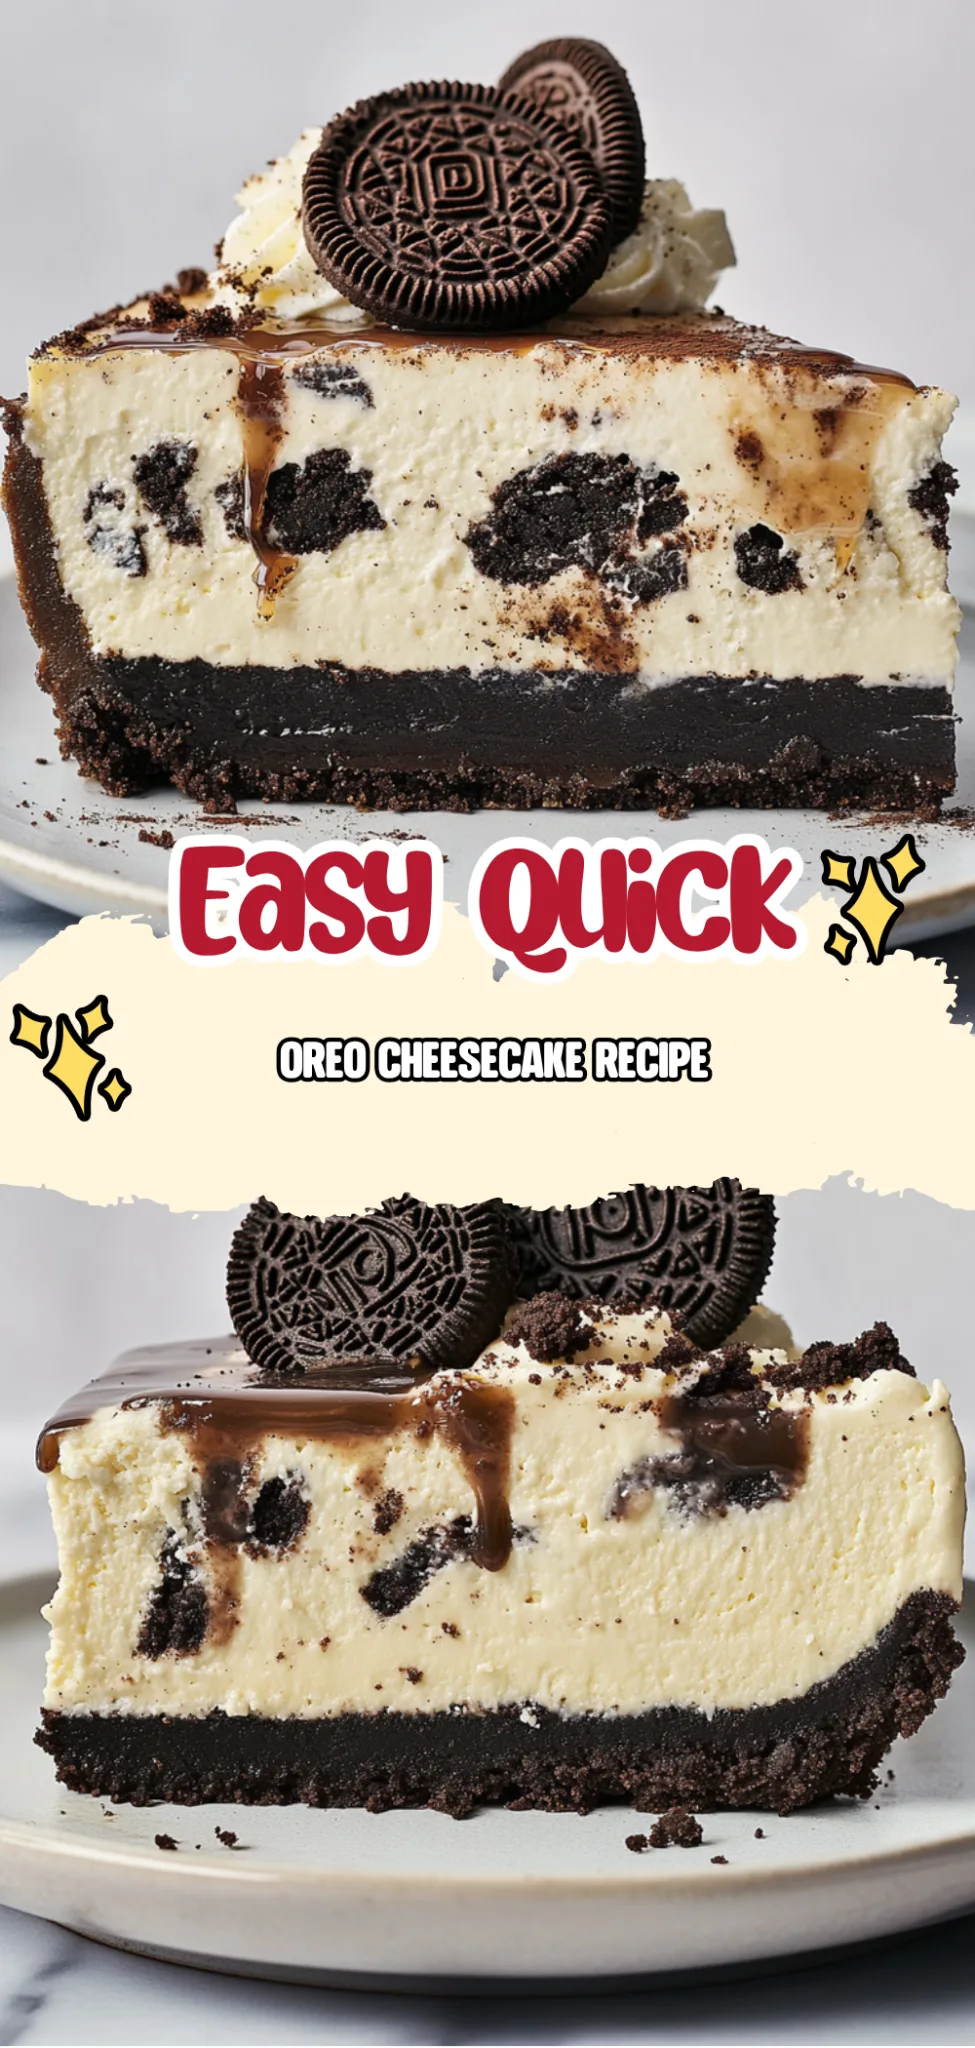
Oreo cheesecake is a delightful dessert that combines the rich creaminess of traditional cheesecake with the iconic flavor of Oreo cookies, making it a beloved favorite in the realm of no-bake treats. This indulgent dish features a buttery crust made from crushed Oreo cookies and melted unsalted butter, while the filling incorporates softened cream cheese, granulated sugar, and chopped Oreos for that signature taste. The result is a creamy and velvety texture that’s both rich and satisfying, topped off with a luscious chocolate ganache and garnished with more Oreos for an extra crunch. Prepared in the oven, this Oreo Cheesecake Recipe is surprisingly easy to make and requires minimal cleanup, allowing you to enjoy every delicious bite without much hassle.
Perfect For:
Sweet Celebrations: This Oreo Cheesecake is the ideal centerpiece for birthdays and anniversaries, bringing a rich, indulgent touch that impresses every guest and makes the occasion feel extra special.
Family Gatherings: With its creamy texture and chocolatey flavor, this cheesecake is a crowd-pleaser that satisfies both kids and adults alike, making it easy to scale for larger families or gatherings.
Cozy Nights In: Treat yourself to a slice on a rainy day when you crave something comforting; the combination of Oreos and rich cheesecake is like a warm hug in dessert form.
Effortless Entertaining: Preparing this dessert ahead of time allows you to enjoy your guests without stress, as it looks stunning and tastes gourmet but requires minimal last-minute effort.
Oreo Cheesecake Recipe Ingredients
For the Crust
- 24 cookies Oreo cookies (crushed) – These provide a deliciously chocolatey base for your cheesecake.
- 5 tablespoons unsalted butter (melted) – This helps bind the crushed Oreos together, creating a rich and cohesive crust.
For the Filling
- 16 ounces cream cheese (softened) – Use softened cream cheese for a smooth and creamy filling without lumps.
- 1 cup granulated sugar – Sweetens the cheesecake beautifully, balancing the richness of the cream cheese.
- 1 teaspoon vanilla extract – Adds a warm, aromatic flavor that complements the chocolate notes perfectly.
- 3 large eggs – Eggs help set the filling and give it a silky texture once baked.
- 12 cookies Oreo cookies (chopped) – Chopped Oreos add delightful chunks throughout the creamy filling, enhancing every bite.
For the Topping
- 1 cup heavy cream (for ganache) – This creates a luscious chocolate ganache that adds an indulgent touch to your cheesecake.
- 8 ounces semisweet chocolate (chopped) – Melts into a rich ganache that beautifully complements the Oreo flavors in this cheesecake recipe.
- 6 cookies Oreo cookies (for garnish) – Crushed or halved, these make for an eye-catching and tasty finish on top of your cheesecake.
Kitchen Equipment You’ll Need
- 9-inch springform pan
- Mixing bowls
- Electric mixer or whisk
- Rubber spatula
- Small saucepan
- Measuring cups and spoons
- Oven mitts
Let’s Make It
Step 1:
Preheat your oven to 350°F (175°C). This is the perfect temperature to get that crust just right!
Step 2:
In a mixing bowl, combine the crushed Oreo cookies with melted butter. Stir them together until the mixture resembles wet sand, ensuring every crumb is coated.
Step 3:
Press this delicious mixture firmly into the bottom of a 9-inch springform pan. Make sure it’s even and compact, as this will form the sturdy base for your cheesecake.
Step 4:
Bake the crust in the preheated oven for 10 minutes. Once it’s done, take it out and let it cool while you prepare the filling.
Step 5:
In a large mixing bowl, beat the softened cream cheese until it’s smooth and creamy. This will create a luscious base for your cheesecake.
Step 6:
Add in the granulated sugar and vanilla extract, mixing everything together until well combined. You should have a silky mixture that’s sweet and aromatic.
Step 7:
Now, add the eggs one at a time, mixing well after each addition. This step helps to ensure that your cheesecake has a perfect texture without any lumps.
Step 8:
Gently fold in the chopped Oreo cookies. This will give your cheesecake delightful bites of cookie throughout!
Step 9:
Pour the creamy filling over your cooled crust in the springform pan. Spread it evenly with a spatula to ensure even baking.
Step 10:
Bake the cheesecake for about 50 minutes until the center is set but still slightly jiggly when you gently shake it. This slight jiggle means it’s perfectly baked!
Step 11:
Turn off the oven and let the cheesecake cool inside for about an hour. This gradual cooling process helps prevent cracks on top of your cheesecake.
Step 12:
While waiting, prepare the ganache by heating heavy cream in a small saucepan until just boiling. Watch closely so it doesn’t boil over!
Step 13:
Remove from heat and add in the chopped semisweet chocolate, stirring until smooth and glossy. This rich ganache will be an indulgent topping for your cheesecake.
Step 14:
Let the ganache cool slightly before pouring it over your cooled cheesecake. Use a spatula to spread it evenly for that perfect finish.
Step 15:
Chill the cheesecake in the refrigerator for at least 4 hours or overnight if you can resist! This chilling time allows all those flavors to meld beautifully.
Step 16:
Before serving, garnish with additional Oreo cookies crumbled on top or whole ones placed decoratively around. They’ll add that final touch of deliciousness!
Tips
- Use room temperature cream cheese: Soften your cream cheese to room temperature for a smooth filling. Cold cream cheese can lead to lumps, affecting the creamy texture of your cheesecake.
- Don’t overmix the eggs: Add eggs one at a time and mix just until incorporated. Overmixing can introduce too much air, causing the cheesecake to crack as it bakes.
- Press the crust firmly: Make sure to press the crushed Oreo mixture firmly into the springform pan for a sturdy base. A well-compressed crust holds together better and provides a satisfying crunch.
- Cool in the oven: Letting the cheesecake cool in the oven after baking helps prevent sudden temperature changes that can cause cracks. This gentle cooling process allows for a smoother surface.
- Chill overnight for best flavor: While you can chill for at least 4 hours, letting your cheesecake sit overnight enhances its flavors and helps it set perfectly. Patience yields delicious results!
- Garnish right before serving: Add extra Oreo cookies as garnish just before serving to keep them crisp. This ensures that they maintain their texture and contrast beautifully with the creamy cheesecake.
Optional Ingredients
- Mascarpone cheese: For an extra layer of creaminess, substitute half of the cream cheese with mascarpone. It adds a rich, velvety texture that elevates the cheesecake experience.
- Cayenne pepper: Just a pinch can add a surprising kick to your cheesecake, creating a delightful contrast to the sweetness. Mix it into the filling for a subtle warmth.
- Raspberries: Fresh raspberries provide a tart contrast that brightens the rich flavors of the cheesecake. Scatter them on top or blend them into a sauce for drizzling over each slice.
- Lemon zest: Adding lemon zest to the filling infuses a refreshing citrus note that balances the richness of the cheesecake. Use about one teaspoon for just the right amount of brightness.
- Caramel sauce: Drizzle warm caramel sauce over the ganache before adding your Oreo garnish. This adds an indulgent sweetness and an appealing glossy finish that’s hard to resist.
What to Pair with Oreo Cheesecake?
To complement the richness of your Oreo Cheesecake, consider serving a fresh arugula salad with cherry tomatoes and a light balsamic vinaigrette. The peppery notes of arugula and the acidity from the vinaigrette provide a refreshing contrast to the dense, creamy cheesecake. This balance helps cleanse the palate between bites, enhancing your overall dessert experience.
Another delightful pairing is roasted seasonal vegetables, such as carrots and Brussels sprouts, seasoned simply with olive oil, salt, and herbs. Their natural sweetness and slight caramelization create a lovely texture contrast against the smoothness of the cheesecake. This side not only offers color to your plate but also adds a savory element that rounds out the meal beautifully.
For a drink option, a glass of cold milk or a rich coffee would be perfect companions for this decadent dessert. The classic pairing of milk enhances the chocolate flavor in the cheesecake while also providing a creamy texture that mirrors its indulgence. Alternatively, a bold espresso can cut through the sweetness beautifully, offering a satisfying finish to your meal.
Variations and Substitutions
Gluten-Free Oreos: Swap regular Oreo cookies with gluten-free Oreo alternatives to create a delicious gluten-free version of this cheesecake. The texture and flavor remain similar, ensuring that everyone can enjoy a slice without compromising on taste.
Peanut Butter Swirl: Add 1/2 cup of creamy peanut butter to the filling for a delightful twist that infuses the cheesecake with rich, nutty flavors. This variation gives you a lovely combination of chocolate and peanut butter reminiscent of a classic favorite.
Mint Chocolate Cheesecake: Incorporate 1 teaspoon of peppermint extract into the filling for an invigorating minty flavor. Pair it with crushed mint-flavored Oreos in place of classic ones, creating a refreshing dessert that’s perfect for holiday gatherings.
Vegan Cheesecake: Substitute cream cheese with vegan cream cheese and use aquafaba instead of eggs (about 1/4 cup equals 1 egg). This creates a creamy texture while keeping it entirely plant-based, making it accessible for those following a vegan diet.
Chocolate Cookie Crust: Instead of Oreos, use crushed chocolate wafer cookies combined with melted coconut oil for the crust. This variation offers a deeper chocolate flavor while maintaining that delightful crunch at the base of your cheesecake.
Coconut Cream Topping: Replace the heavy cream in the ganache with coconut cream for a tropical flair. This adjustment lends a subtle coconut flavor and enhances the richness, making your cheesecake feel like a vacation in dessert form.
Fruit-Infused Filling: Fold fresh raspberries or strawberries into the cheesecake filling along with the chopped Oreos. The tartness of the fruit cuts through the richness, providing a beautiful contrast and adding vibrant color to your dessert.
How to Store
To store your Oreo Cheesecake in the refrigerator, allow it to cool completely before transferring it to an airtight container or covering it tightly with plastic wrap. It will keep well in the fridge for up to five days. If you want to enjoy it later, you can gently reheat individual slices in the microwave for about 10-15 seconds; this helps restore its creamy texture without compromising the flavor.
While Oreo Cheesecake can be frozen, keep in mind that the texture may change slightly upon thawing. To freeze, wrap the cheesecake tightly in plastic wrap and then place it in a freezer-safe container or bag. It can be stored frozen for up to three months. When you’re ready to enjoy it again, thaw it overnight in the refrigerator and serve chilled for the best results.
Frequently Asked Questions
Can I use reduced-fat cream cheese for this recipe?
Yes, you can use reduced-fat cream cheese, but it may alter the texture and richness of the cheesecake slightly. The cheesecake might be less creamy and a bit denser than when using full-fat cream cheese.
How can I achieve a firmer cheesecake?
To achieve a firmer cheesecake, make sure to bake it until the center is set but still slightly jiggly. Additionally, chilling the cheesecake overnight will help it firm up nicely before serving.
Can I substitute the semisweet chocolate in the ganache?
Absolutely! You can use dark chocolate or milk chocolate instead of semisweet chocolate for the ganache. Just keep in mind that this will change the overall sweetness and flavor profile of the topping.
How long should I cool the cheesecake before refrigerating?
After baking, let the cheesecake cool in the oven with the door slightly ajar for about an hour. This gradual cooling helps prevent cracks on the surface before you chill it in the refrigerator.
Is it possible to make this cheesecake gluten-free?
Yes, you can make this Oreo cheesecake gluten-free by using gluten-free Oreo cookies for both the crust and filling. Ensure that all other ingredients are also certified gluten-free.
Can I prepare the crust in advance?
Yes, you can prepare the crust ahead of time. Simply make it as directed, let it cool completely, and then cover it tightly with plastic wrap or store it in an airtight container until you’re ready to add the filling.
Do I need a springform pan for this recipe?
Using a springform pan is recommended because it allows for easy removal of the cheesecake without damaging its delicate structure. If you don’t have one, you can use a regular cake pan, but be cautious when removing the cheesecake from it.
Leave a Comment