Deliciously Spooky and Fun!
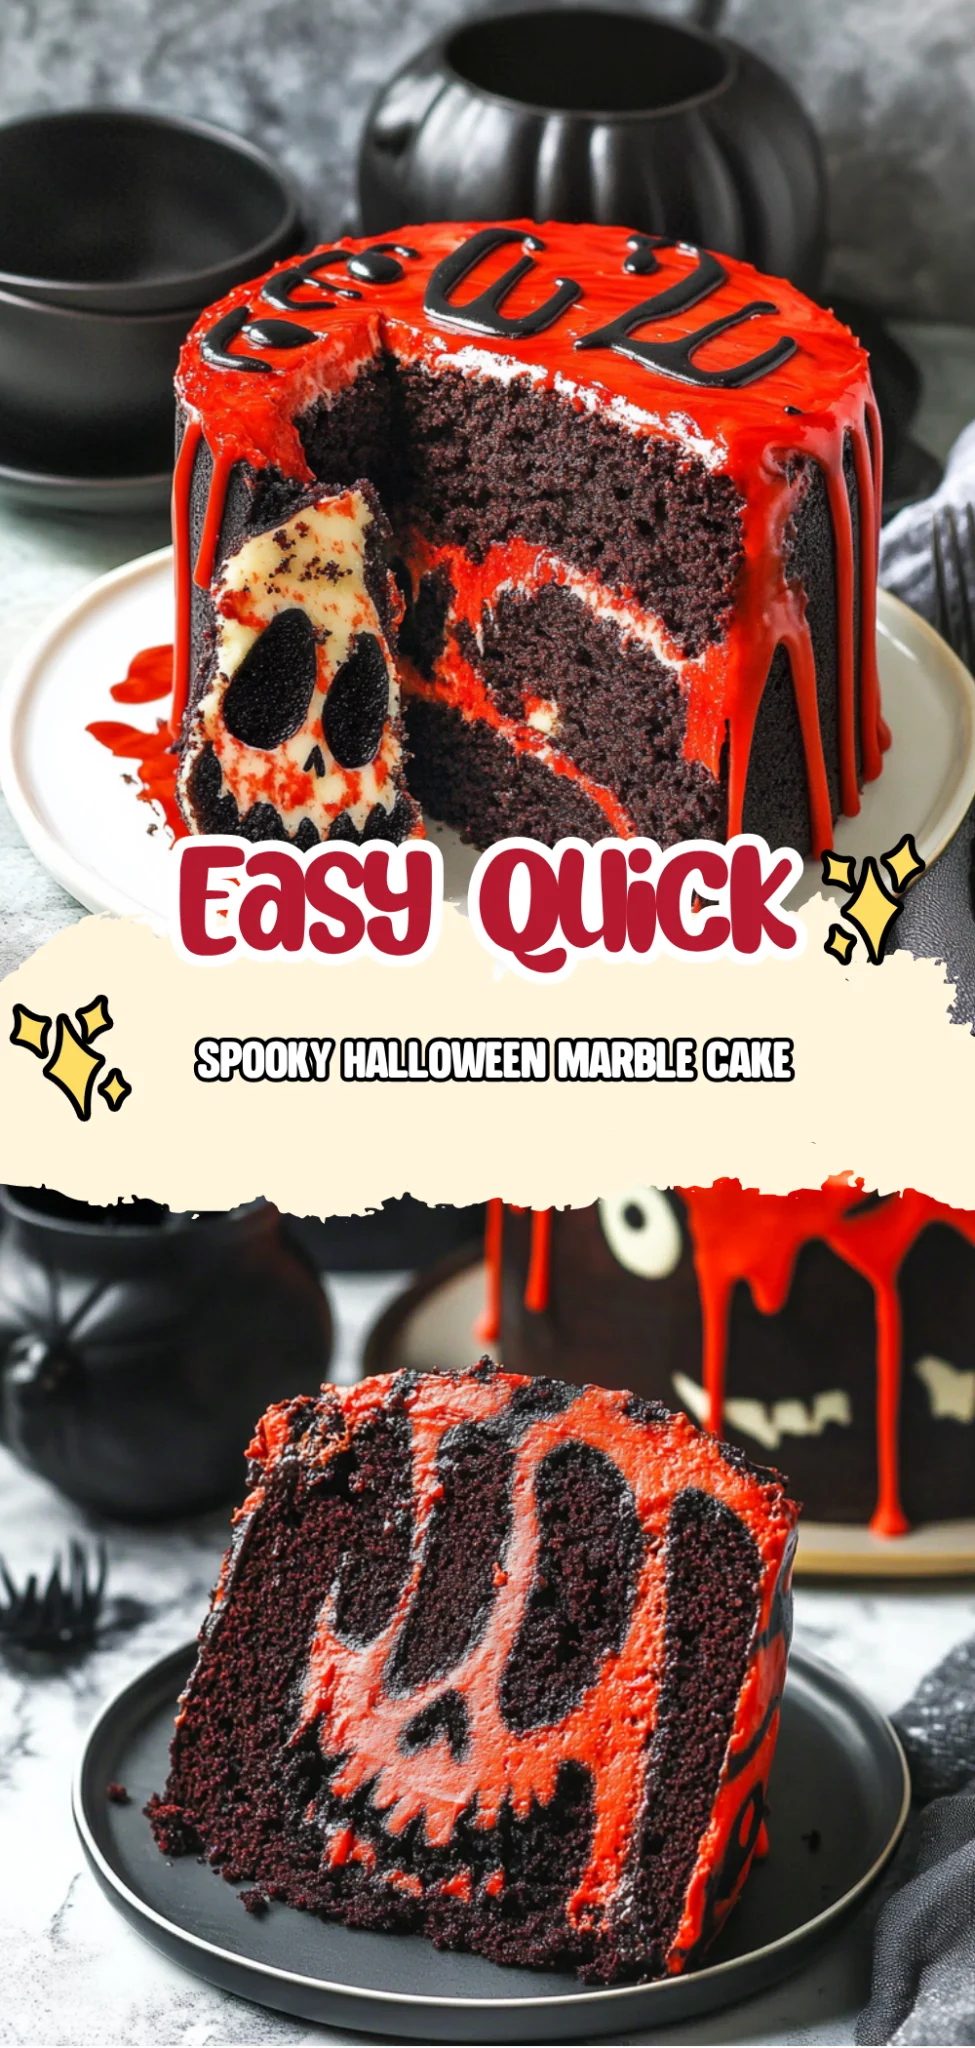
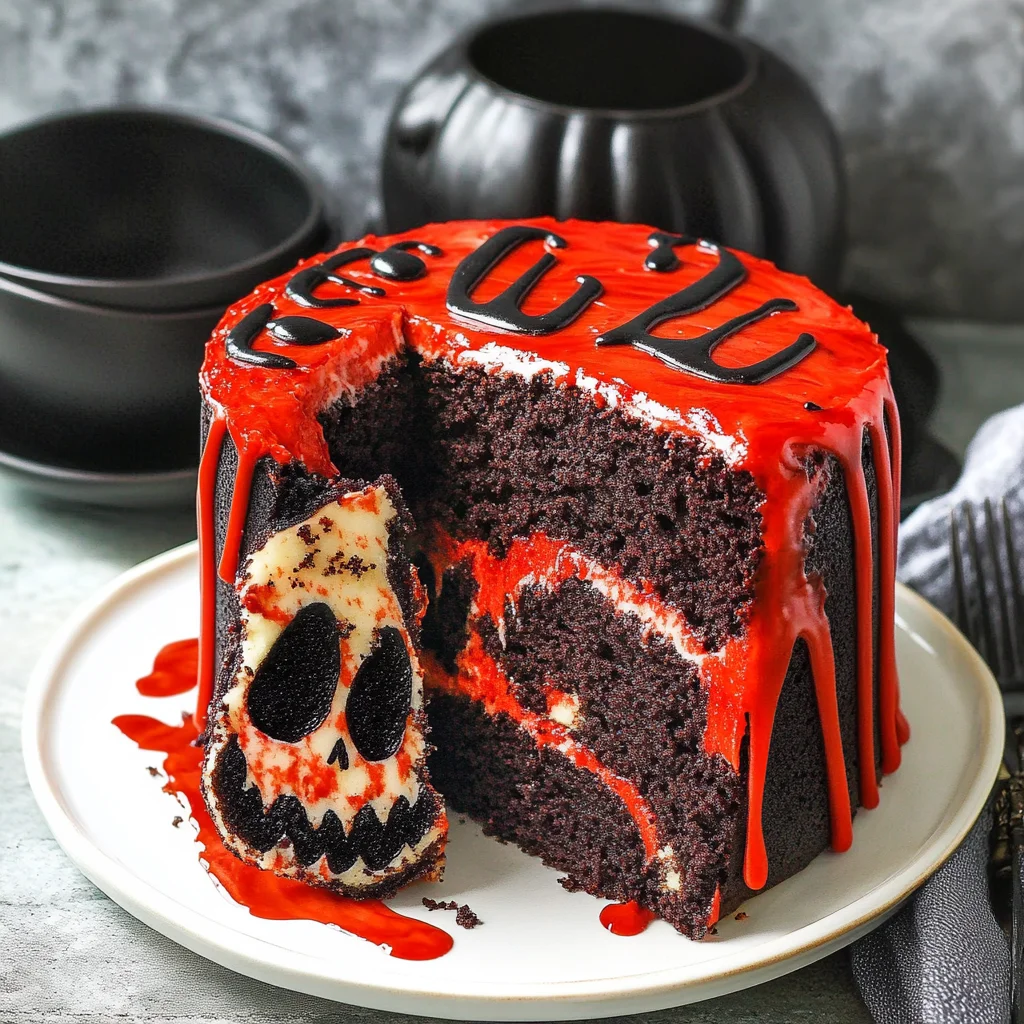
Last Halloween, I decided to whip up a treat that would bring a smile to everyone’s face, and that’s when I created the Spooky Halloween Marble Cake. The blend of rich chocolate and fluffy vanilla swirls made it not just easy to bake but also absolutely delicious—every bite was a delightful surprise!
What makes this cake truly special is the enchanting aroma that fills your kitchen as it bakes, drawing in family and friends with its warm, inviting scent. Watching their eyes light up when they see the vibrant marbled design is an experience like no other; it’s perfect for a cozy gathering or even a festive party with kids running around.
To elevate your spooky feast, serve this cake alongside a scoop of vanilla ice cream or drizzle it with a warm chocolate glaze for extra indulgence. Trust me, as you slice into this charming treat, you’ll feel the excitement of Halloween come alive in your home—so grab your apron and let’s get baking!
What are Spooky Halloween Marble Cake?
Spooky Halloween Marble Cake is a delightful and festive dessert that combines the rich flavors of chocolate and vanilla in a fun, marbled pattern, perfect for celebrating the Halloween season. This cake is made using a blend of essential ingredients, including softened unsalted butter, granulated sugar, large eggs, all-purpose flour, and milk, which create a tender and moist texture with a light crumb. The addition of cocoa powder provides a deep chocolate flavor, while black food coloring adds an eerie twist to the cake’s appearance. Baked in the oven, this treat is not only easy to prepare but also requires minimal cleanup, making it an ideal choice for both novice and experienced bakers looking to add a spooky touch to their festivities.
Perfect For:
Halloween Celebrations: This spooky marble cake is a delightful centerpiece for any Halloween gathering, combining festive flavors with an eye-catching design that will thrill your guests.
Family Fun: Get the whole family involved in baking! This recipe is simple enough for kids to help with, making it a perfect way to create lasting memories together in the kitchen.
Party Treats: Whether you’re hosting a costume party or attending one, this cake is easily sliceable and can be made ahead of time, ensuring you have a delicious treat ready to impress everyone.
Comforting Indulgence: Enjoy a cozy night in with this comforting cake that pairs perfectly with a warm cup of cider or hot chocolate, making it an ideal treat for those chilly October evenings.
Spooky Halloween Marble Cake Ingredients
For the Batter
- 1 cup unsalted butter (softened) – This provides a rich and creamy texture to your cake.
- 2 cups granulated sugar – Sweetens the cake and helps achieve that perfect light and fluffy consistency.
- 4 large eggs – Binds the ingredients together and adds moisture for a delightful crumb.
- 3 cups all-purpose flour – The base of your cake, providing structure and stability to the batter.
- 1 cup milk (room temperature) – Ensures a moist cake; room temperature helps it mix evenly with other ingredients.
- 2 teaspoons baking powder – Acts as a leavening agent, giving your cake that lovely rise.
- 1 teaspoon vanilla extract – Adds depth of flavor, enhancing the sweetness of the cake.
- 1 cup cocoa powder (unsweetened) – Gives your cake its rich chocolate flavor and beautiful marbling effect.
- 1 cup black food coloring (for spooky effect) – Creates a hauntingly beautiful appearance for your Spooky Halloween Marble Cake.
For the Frosting
- 1 cup unsalted butter (softened) – This creates a creamy and smooth frosting that spreads easily over the cake.
- 4 cups powdered sugar – Sweetens the frosting while ensuring it’s light and fluffy in texture.
- 1 teaspoon vanilla extract – Enhances the flavor profile of your frosting, making it irresistible.
- 2 tablespoons milk (to adjust consistency) – Helps achieve the desired spreadable texture for your frosting.
- 2 tablespoons orange food coloring (for decoration) – Adds festive flair, perfect for decorating your Halloween treats!
Kitchen Equipment You’ll Need
- 9-inch round cake pan
- Mixing bowls
- Whisk
- Electric mixer or whisk
- Rubber spatula
- Knife
How to Make Spooky Halloween Marble Cake
Step 1:
Preheat your oven to 350°F (175°C) and prepare a 9-inch round cake pan by greasing and flouring it. This will help the cake release easily once it’s baked, ensuring a perfect marble effect.
Step 2:
In a mixing bowl, cream together the softened butter and granulated sugar until the mixture is light and fluffy. This step is crucial for incorporating air into the batter, which will give your cake a lovely texture.
Step 3:
Add the eggs one at a time, mixing well after each addition to ensure they are fully incorporated. Stir in the vanilla extract for that delightful flavor that complements both chocolate and vanilla batters.
Step 4:
In another bowl, whisk together the all-purpose flour and baking powder. Gradually add this dry mixture to your creamed mixture, alternating with the room temperature milk. This will create a smooth batter that’s not too thick or too runny.
Step 5:
Divide the batter in half. To one half, add the cocoa powder and mix until well combined. In the other half, stir in the black food coloring until you achieve a spooky hue. This is where your Halloween theme really starts to come alive!
Step 6:
Spoon the batters alternately into your prepared cake pan, creating a layered effect. Then, take a knife and gently swirl them together to create a beautiful marbled design that will be revealed once baked.
Step 7:
Bake in your preheated oven for 30-40 minutes, or until a toothpick inserted into the center comes out clean. Keep an eye on it; you want that perfect golden brown color on top!
Step 8:
Allow the cake to cool in the pan for about 10 minutes before turning it out onto a wire rack to cool completely. This step helps prevent it from breaking apart while still warm.
Step 9:
While your cake is cooling, prepare the frosting by beating softened butter in a mixing bowl until creamy. Gradually add powdered sugar while mixing until you have a smooth consistency that’s ready for spreading.
Step 10:
Add in the vanilla extract and milk, continuing to mix until the frosting reaches a spreadable consistency. You want it just right—not too stiff but thick enough to hold its shape when applied to your cake.
Step 11:
Incorporate orange food coloring into your frosting and mix until you achieve your desired festive color. This bright hue will really pop against your spooky marble cake!
Step 12:
Once your cake is completely cool, spread the orange frosting evenly over both the top and sides of the cake. Don’t be shy—go for an even coating that covers every delicious inch of it!
Step 13:
Finally, decorate with Halloween-themed sprinkles or edible decorations as desired. Have fun with this step; it’s all about making your spooky creation look as festive as possible!
- Use room temperature ingredients: Bringing your butter, eggs, and milk to room temperature helps create a smooth and well-emulsified batter, which results in a lighter, fluffier cake.
- Don’t overmix the batter: After combining the dry ingredients with the wet, mix just until incorporated. Overmixing can lead to a dense cake due to gluten development — you want that airy texture!
- Check for doneness properly: Instead of relying solely on baking time, use a toothpick to test for doneness. Insert it into the center; if it comes out clean or with a few crumbs attached, your cake is perfectly baked.
- Cool completely before frosting: Allow the cake to cool completely on a wire rack before applying frosting. This prevents the frosting from melting and sliding off, ensuring a beautiful finish.
- Adjust frosting consistency as needed: If your frosting is too thick after adding powdered sugar, add milk one tablespoon at a time until it reaches your desired spreadable consistency for easy application.
- Swirl batters gently for marbling: When spooning the chocolate and black batters into the pan, use a knife or skewer to gently swirl them together. Avoid vigorous mixing; this keeps distinct layers for that spooky marble effect.
Optional Ingredients
- Cream cheese: Incorporate into the frosting for a tangy twist that adds richness and depth, balancing the sweetness of the cake perfectly.
- Cinnamon: A sprinkle of cinnamon in your batter infuses warm spice notes that enhance the chocolate flavor and evoke cozy autumn vibes.
- Pumpkin puree: Fold in a cup of pumpkin puree for added moisture and a subtle earthiness, creating a delightful flavor profile that complements the chocolate and vanilla.
- Lemon zest: Grate some fresh lemon zest into your frosting for a bright, citrusy kick that cuts through the richness and adds an unexpected zing.
- Chocolate ganache: Drizzle a silky chocolate ganache over the finished cake for an indulgent glossy finish that enhances both flavor and visual appeal.
What to Pair with Spooky Halloween Marble Cake?
To complement the rich flavors of the Spooky Halloween Marble Cake, consider serving a fresh arugula salad with pear slices and candied walnuts. The peppery bite of arugula alongside the sweetness of the pears creates a delightful contrast to the cake’s decadent chocolate and vanilla layers. Additionally, the crunchy texture of the walnuts adds an enjoyable crunch that balances the cake’s softness, making each bite an adventure.
For a heartwarming side, roasted sweet potatoes seasoned with cinnamon and nutmeg can beautifully harmonize with your festive dessert. The natural sweetness of the potatoes echoes the sugary notes in the cake while their earthy flavor provides depth. This comforting side dish not only enhances the meal’s overall richness but also offers a seasonal touch that aligns perfectly with Halloween festivities.
When it comes to beverages, a glass of spiced apple cider is an excellent choice to serve alongside your marble cake. The warm spices in the cider will enhance the cocoa flavor in the cake while providing a refreshing contrast to its sweetness. This pairing not only warms up your gathering but also invokes cozy autumn vibes that are perfect for celebrating Halloween.
Variations and Substitutions
Coconut oil instead of butter: Swap out the unsalted butter for an equal amount of melted coconut oil to create a dairy-free version of this cake. This substitution will add a subtle coconut flavor and moisture that pairs beautifully with the chocolate and vanilla.
Almond milk for dairy milk: Use almond milk in place of regular milk for a nutty twist that caters to those who are lactose intolerant or following a vegan diet. The cake will still be rich and moist, with a hint of almond flavor that complements the vanilla.
Gluten-free flour blend: For a gluten-free option, substitute all-purpose flour with a 1:1 gluten-free flour blend. This ensures everyone can enjoy your spooky creation without sacrificing texture or taste, maintaining a light and fluffy cake.
Brown sugar instead of granulated sugar: Try using brown sugar instead of granulated sugar for added moisture and a deeper caramel flavor. This swap will give your cake a richer taste, enhancing the overall sweetness while perfectly balancing the cocoa.
Pumpkin puree for eggs: Replace each egg with 1/4 cup pumpkin puree for a moist, egg-free cake that also adds an autumnal twist. This variation not only caters to vegans but also infuses the cake with a delightful hint of pumpkin spice flavor.
Peanut butter frosting: Switch up the frosting by adding 1/2 cup of creamy peanut butter to the standard frosting mix. This will provide a deliciously nutty layer that contrasts wonderfully with the sweet orange hue, making it perfect for peanut butter lovers.
Spicy chocolate addition: Incorporate 1 teaspoon of cayenne pepper or chili powder into the cocoa batter for an unexpected spicy kick that enhances the chocolate flavor. This fiery twist is sure to surprise and delight adventurous eaters during Halloween festivities!
To store your Spooky Halloween Marble Cake in the refrigerator, first ensure it has cooled completely. Place the cake in an airtight container or cover it tightly with plastic wrap to prevent it from drying out. It will keep well for up to 5 days. When you’re ready to enjoy it again, simply slice a piece and microwave it for about 10-15 seconds to restore its moist texture.
This cake can also be frozen if you’d like to save some for later, though be aware that the texture may change slightly upon thawing. Wrap individual slices in plastic wrap and then place them in a freezer-safe container or a resealable plastic bag to avoid freezer burn. It will stay fresh for up to 3 months in the freezer. To thaw, move the cake to the refrigerator overnight and reheat in the microwave for a few seconds before serving.
FAQ
Can I use margarine instead of unsalted butter in this recipe?
Yes, you can substitute margarine for unsalted butter in the cake batter and frosting. However, keep in mind that the flavor and texture may vary slightly, as butter adds richness that margarine might not replicate fully.
Is it possible to make this cake without black food coloring?
Absolutely! If you prefer not to use black food coloring, you can omit it altogether or use a different color, such as purple or dark green, to maintain a Halloween theme while still achieving a fun marbled effect.
How do I know when my cake is fully baked?
To check if your Spooky Halloween Marble Cake is done, insert a toothpick into the center. If it comes out clean or with just a few crumbs attached, the cake is ready. Be careful not to overbake, as this can dry out the cake.
Can I prepare the cake batter in advance and store it?
Yes, you can prepare the cake batter ahead of time. Store it in the refrigerator for up to 24 hours before baking. Just remember to allow it to come back to room temperature before pouring it into the cake pan and baking.
Can I make this cake gluten-free?
Certainly! To make a gluten-free version of this marble cake, simply replace all-purpose flour with a 1: 1 gluten-free flour blend. Be sure to check that all other ingredients are also gluten-free.
Do I need any special equipment to make this recipe?
No special equipment is required for this recipe; basic baking tools like mixing bowls, measuring cups, and an electric mixer will suffice. A good quality 9-inch round cake pan is essential for even baking, so ensure yours is well-prepared.
How should I store leftovers from this cake?
To store leftover marble cake, wrap it tightly in plastic wrap or place it in an airtight container. It can be kept at room temperature for up to three days or refrigerated for up to a week. If you want to keep it longer, consider freezing slices individually.
Spooky Halloween Marble Cake
Ingredients
Method
- Preheat the oven to 350°F (175°C). Grease and flour a 9-inch round cake pan.
- In a mixing bowl, cream together the softened butter and granulated sugar until light and fluffy.
- Add the eggs one at a time, mixing well after each addition. Stir in the vanilla extract.
- In another bowl, whisk together the flour and baking powder. Gradually add to the creamed mixture, alternating with the milk.
- Divide the batter in half. To one half, add the cocoa powder and mix well. To the other half, add the black food coloring and mix until combined.
- Spoon the batters alternately into the prepared cake pan, then use a knife to swirl them together for a marbled effect.
- Bake in the preheated oven for 30-40 minutes, or until a toothpick inserted into the center comes out clean.
- Allow the cake to cool in the pan for 10 minutes, then turn out onto a wire rack to cool completely.
- In a mixing bowl, beat the softened butter until creamy. Gradually add the powdered sugar, mixing until smooth.
- Add the vanilla extract and milk, mixing until the frosting reaches a spreadable consistency.
- Add orange food coloring and mix until the desired color is achieved.
- Once the cake is completely cool, spread the orange frosting evenly over the top and sides of the cake.
- Decorate with Halloween-themed sprinkles or edible decorations as desired.


Leave a Comment